


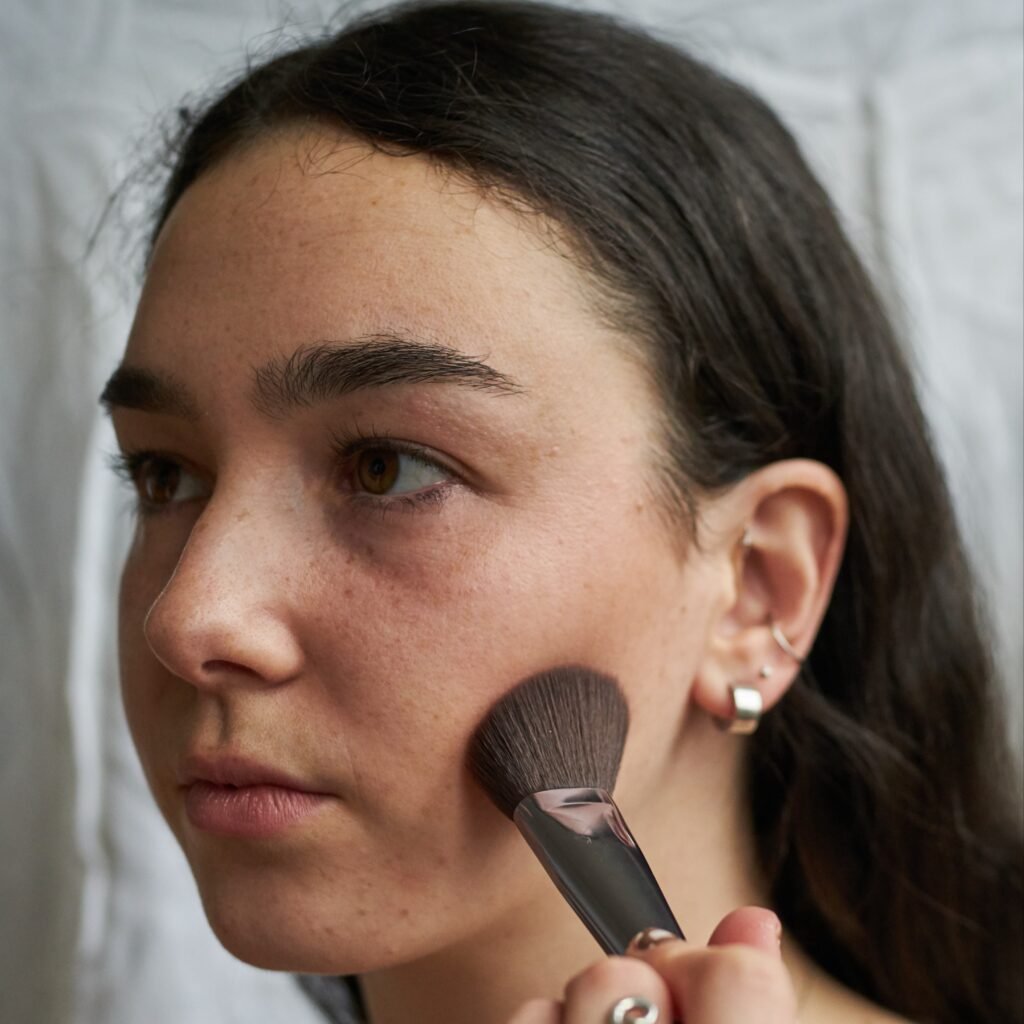
If contouring feels intimidating, this tip changes the game: you don’t need long lines or complicated shapes — just one strategically placed dot. Makeup theorist Megan Lavallie popularized a simple trick that’s perfect for beginners. All you do is:
- Find the hollow of your cheek — the spot where, if you lightly touched your finger, you could poke through toward your teeth.
- Apply a small dot of contour there.
- Blend it softly outward with a brush.
This single action mimics natural shadows and instantly defines cheekbones without harsh lines or over‑application.
This method works with both cream and powder contours and is foolproof for everyday makeup or a quick sculpted look before an event.
Contour 101: What It Is and How It Helps
At its core, contouring is about creating subtle shadows to enhance your natural bone structure — not about looking like you’re wearing makeup. Think of it as gentle shadow playing. Using a shade just 1–2 tones darker than your skin creates a believable contour that looks like natural depth rather than paint.
A common approach for beginners is to start with powder contour, which tends to be easier to blend and less intimidating than creams or liquids.
Where to Place Contour (Beginners’ Placement Guide)
Here’s a basic map of contour placements that flatter most faces:
✔ Cheek hollows
Apply contour where your cheek naturally dips — just under the apples of your cheeks — and blend upward toward your hairline. This enhances definition without looking muddy.
✔ Temples & hairline
Light shadows here help define the upper face and visually lift the features.
✔ Jawline
A little contour under the jaw and down the side can sharpen and define the jawline.
(Bonus: as you get more comfortable, you can add softer contour under the chin or on the sides of the nose — but these are optional for beginners.)
Pro Blending Tips
The key to contour looking good (especially on beginners) isn’t the amount of product — it’s how you blend it. Here’s how to get that seamless, “no one knows you’re wearing contour” finish:
- Use gentle, circular or feathered strokes with your brush or sponge to melt the product into skin — no harsh lines.
- Warm the product on your hand first if you’re using creams — that helps it blend smoothly and prevents patchiness.
- Avoid downward strokes, which can drag your features; blend upward and outward to lift the face visually.
- Check your work in different lighting — natural light will show if anything looks too dark or unblended.

Shade & Finish: Quick Rules to Follow
- Choose matte contour shades — contour products should mimic shadow, not shimmer. Shimmer belongs in highlighter, not in contour.
- For everyday looks, go subtle — contour doesn’t have to be dramatic to be effective. A soft, natural finish is more flattering and easier to blend.
- If you’re unsure of your undertone, stick with a cool‑leaning taupe or soft neutral shade, which reads more natural than overly warm brown shades.
Contour Mistakes Beginners Can Avoid
✅ Too much product at once — start light, build gradually.
✅ Using shimmer contour — saves shimmer for highlighter only.
✅ Blending downward — always upwards to lift features.
✅ Skipping lighting checks — natural light shows your true color and blend.
In a Nutshell: Easy Contour for Beginners
Contouring doesn’t have to be intimidating or full of lines and diagrams. For beginners, the most effective trick is simple: apply a tiny amount where your cheek naturally dips, then blend outward. From there you can add light contour to other areas like temples or jawline if you want more definition. With subtle shade selection and careful blending, you’ll create dimension that looks soft, natural, and flattering — even if you’re just starting out.
